Document Reader Tutorial
Table of Contents
This tutorial will explain how to find, open, and view documents in Pleco’s document reader module. Most of the document reader module is a paid add-on; it can be purchased through the Add-ons tab inside of Pleco. However, the clipboard reader portion of it is part of our free basic app.
Clipboard Reader
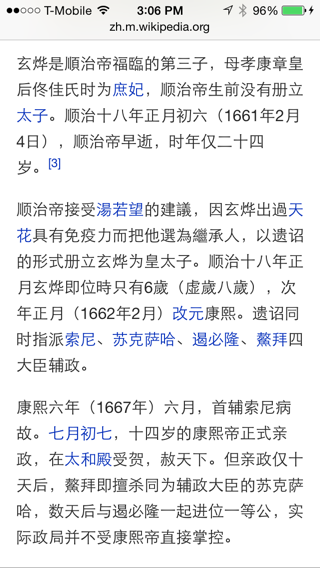
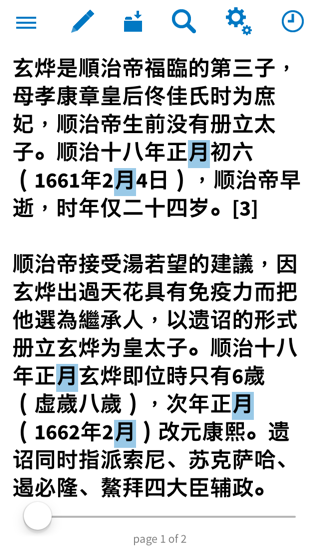
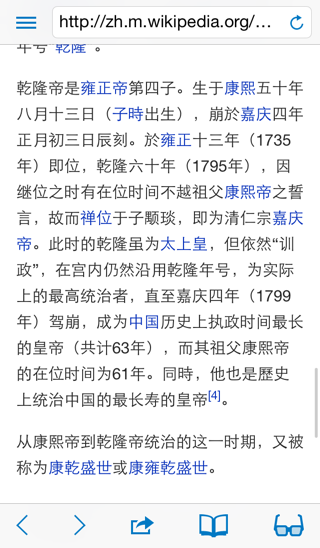
The clipboard reader lets you look up Chinese text copied to the system clipboard. You can do this from all sorts of places, usually by tap-holding on the text - as an example, let’s copy some text out of a web page. Open up Safari, navigate to Chinese Wikipedia (zh.wikipedia.org) or, if you’re in China, Baidu Baike (baike.baidu.com), and pull up a random article:
Tap-hold on the text to select it, then drag the edges of the selection to highlight a couple of paragraphs:
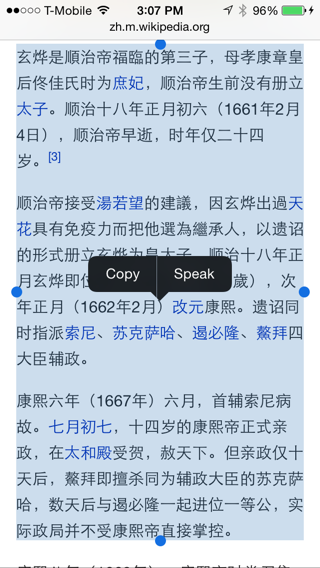
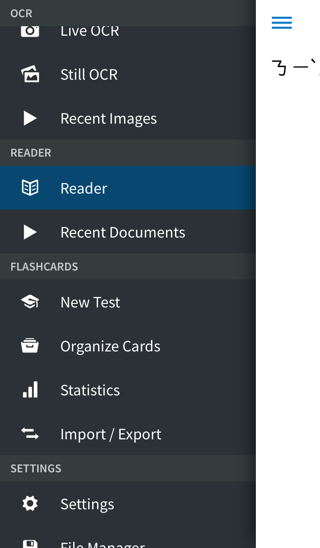
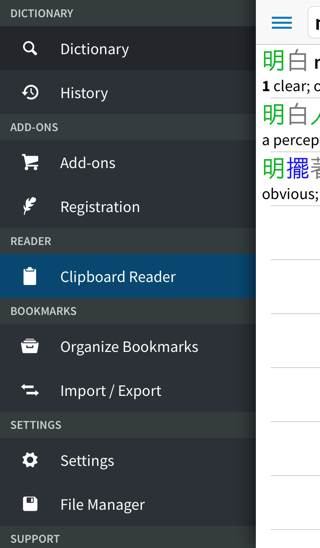
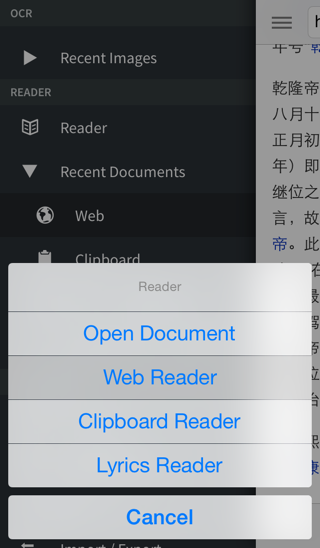
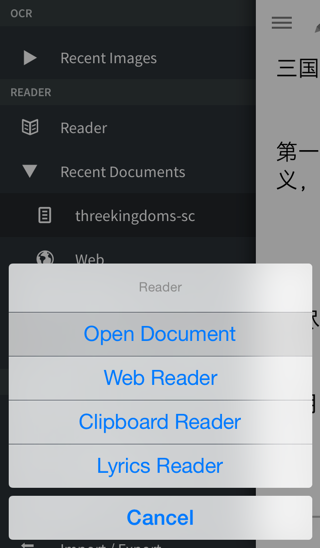
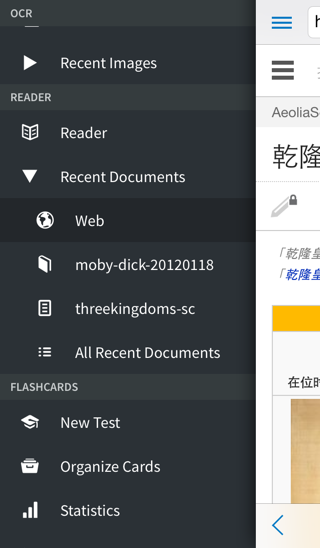
Tap on “Copy” to copy the text to the clipboard. Then, open up Pleco and pull up the sidebar menu. The next step differs slightly depending on whether or not you’ve purchased our Document Reader add-on. If you have purchased it, tap on “Reader”:
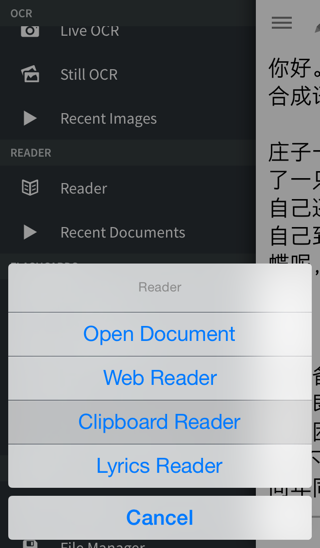
and tap on “Clipboard Reader” in the menu that pops up:
If you have not yet purchased our Document Reader add-on, just tap on the “Clipboard Reader” item directly:
In either case, you’ll end up on a screen with the text in the clipboard displayed:
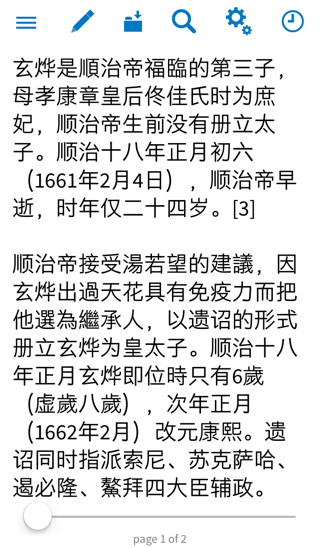
You can scroll between pages by swiping right-to-left or left-to-right, just as in iBooks or Kindle.
Popup Reader Interface
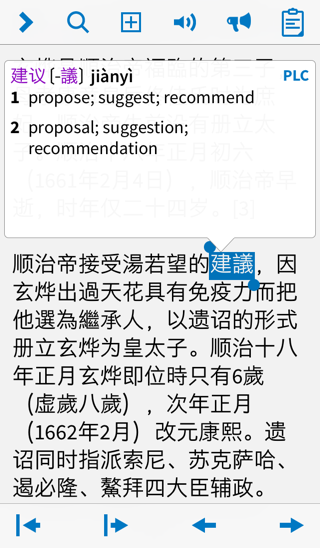
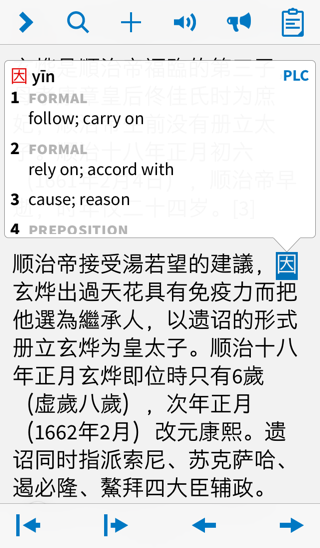
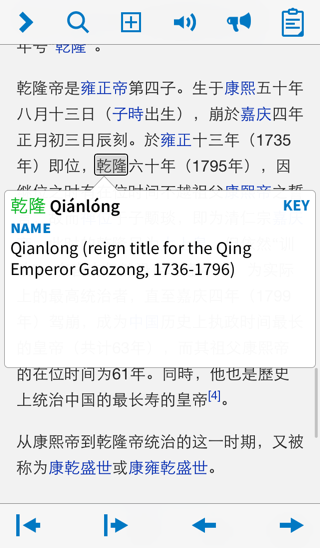
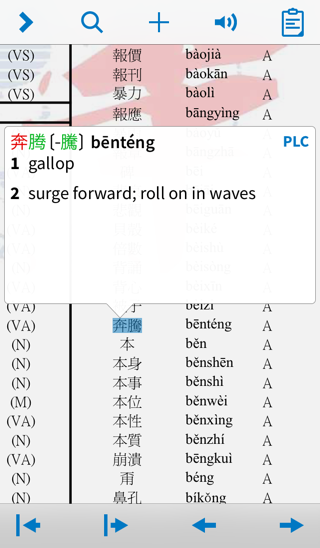
Tap on any character / word in this screen to look it up:
There’s lots of functionality packed in here.
At the right of the popup definition you’ll notice a dictionary abbreviation icon (PLC or CC or ABC or another dictionary you’ve installed), and possibly also a pair of arrows pointing up and down. Tap on the dictionary icon to switch between dictionaries, and tap on the arrows to scroll through the matching entries (if there are more than one) in the current dictionary.
Tap anywhere outside of the bubble to dismiss it / return to reading.
In the toolbar at the bottom of the screen, the two arrows on the right let you navigate from word to word - left arrow to the previous word, right arrow to the next word - while the other two arrows expand / shrink the selected text range. Tap on the right arrow now to advance to the next word:
You can also adjust the highlighted range by dragging the blue dots at the start / end of it. If you end up selecting something that isn’t in the dictionary, the definition bubble will disappear but you’ll still be able to copy / search for / listen to / create a (custom) flashcard based on the selected text.
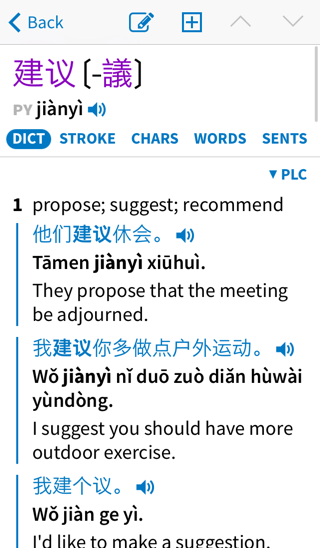
Tap on the > button to bring up the current definition in its own dedicated screen:
From there, tap the “Back” button at the top left corner of the screen to return to the reader.
Tap on the audio button to play audio for the current headword, tap on the clipboard icon to copy the current word to the clipboard, or tap on the + button to add the current word to your flashcard database.
Tap on the magnifying glass button to drop back to the main dictionary screen and do a new search for the highlighted word; you can return to the reader from there through the sidebar menu.
Finally, tap on the  icon to activate the text-to-speech system and have Pleco start reading the text out loud:

The ‘bubble’ icon at the top left corner of the screen will show / hide the definition bubble; the ‘gauge’ icon lets you adjust the playback speed, and the X icon exits text-to-speech mode. The pause button at the bottom of the screen lets you pause and resume audio play.
Clipboard History
Tap on the clock icon in the top toolbar to bring up a history of recently viewed clipboards:
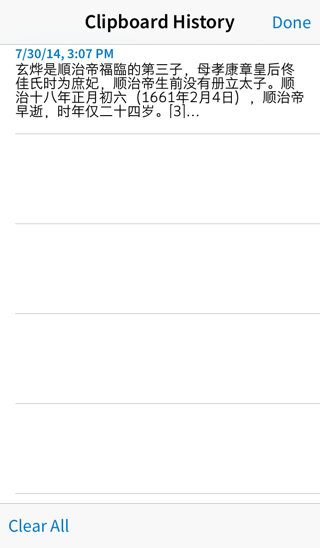
Tap on any item here to view it; you can then tap on the ‘reload’ icon to return to the current clipboard.
Document Settings
Tap on the gear icon in the top toolbar to bring up a screen of display settings for this document:
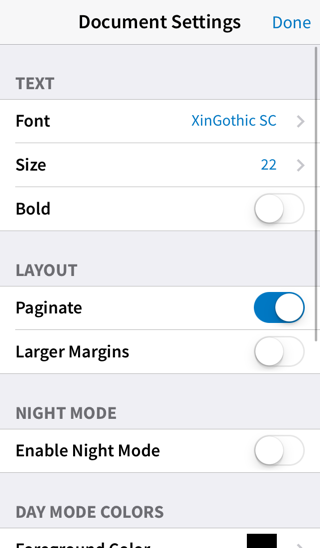
You can adjust the font, font size, boldface, color scheme, and whether or not the document is paginated; with ‘paginate’ turned off, it’ll be a single scrolling view (like a web page) instead of left-to-right pages. Try turning on “Bold” now:
Search
Tap on the magnifying glass icon in the top toolbar to bring up a screen that lets you search within the document:

Pleco’s handwriting input / Pinyin are not currently supported in here, so you’ll need to use the system Pinyin or handwriting keyboard (see the basic tutorial for info on how to enable those).
Enter your search term, then tap on a result to jump to its location in the document:
Web Reader
(paid version only from this point on)
Go back to the sidebar menu, choose “Reader” again, and tap “Web Reader”:
This is a standard web browser view, pretty much - enter an address in the address bar and tap “Go” to go to it:
Then, simply tap on a word to pull up its definition right on the page:
You can also tap on the ‘eyeglasses’ icon to get a plaintext transcript of the page, which may be easier to read and tap on words in:
File Reader
Go back to the sidebar menu, choose “Reader” again, and tap “Open Document”:
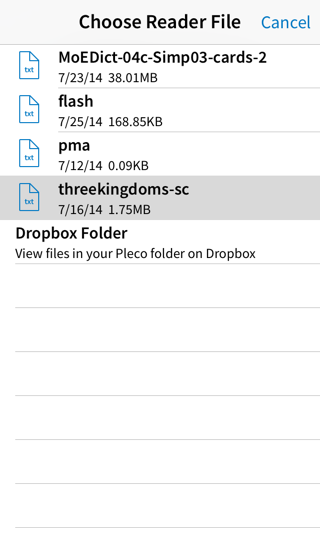
This will bring up a file picker screen. We support a wide variety of file formats - TXT, EPUB (without DRM), DOC/DOCX, RTF, Pages, HTML, and PDF, though our PDF support in the Document Reader only applies to PDFs that include electronic text; for PDFs that consist solely of scanned images you’ll need to use our OCR module instead.
There are lots of different ways to get document files into Pleco:
- Choose “Share” and/or “Open In” on an email attachment or a document in your favorite file storage app (Dropbox, Google Drive, etc), then choose Pleco as the app to open that document in.
- Download them directly using the Web Reader above.
- Go into the “File Manager” screen in Pleco on two iOS devices and tap “Share Files” to wireless beam a file from one device to another.
- Go into the “File Manager” screen on one device’s copy of Pleco, tap on the ⓘ next to a file, tap “Open In,” and select the other device under AirDrop. (make sure you’ve turned on AirDrop in Control Center first)
- Go into “File Manager” / “Upload Download Files,” make sure “Enable Uploads” is turned on, then type the address under “Address Details” into your computer’s web browser and you can transfer files to your device through that interface.
- Connect your device to your computer with a USB cable, open up iTunes, tap on your device’s name at the top right corner of the screen, click on the “Apps” tab at the top of the screen, then click on “Pleco” under “File Sharing” (in the bottom half of the screen) and you can copy files to / from Pleco’s storage area on your device through that screen.
In any case, once you’ve done that, select your file in the file picker screen:
If the file is in plaintext, you might see this additional prompt on opening the file:
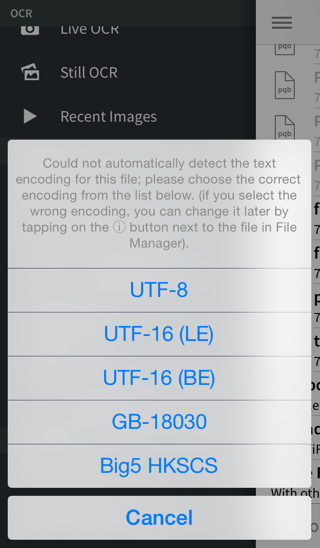
You’ll most likely want to choose GB here if your file is in simplified characters or Big5 if it’s in traditional; however, if it’s a relatively new file it might be in one of the Unicode formats instead. If you pick the wrong option and end up with gibberish, you can change it by tapping on the gear icon at the top of the screen when viewing the document.
In any event, the file should then come up in Pleco:
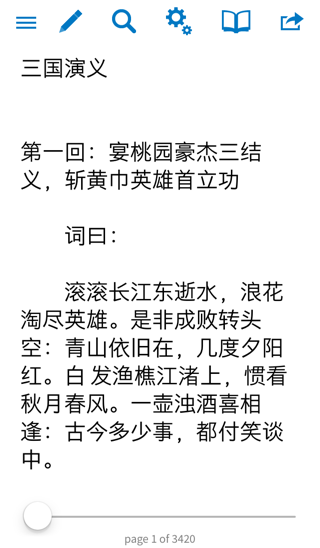
The interface here is pretty much identical for any document type other than a PDF file - see below for information on those. The only other changes are that DOC / RTF files don’t currently offer a pagination option - you can only view them with vertical scrolling - and that EPUB files include extra information about chapters in the bottom of the screen and let you jump to specific chapters through the ‘Bookmarks’ screen (see below).
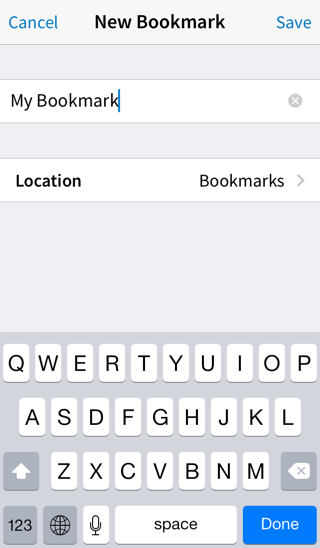
This mostly works like the Clipboard Reader screen, but with one important addition - bookmarks (not supported in DOC/RTF/HTML files); tap on the button at the top right corner of the screen to bookmark your current place in the document:
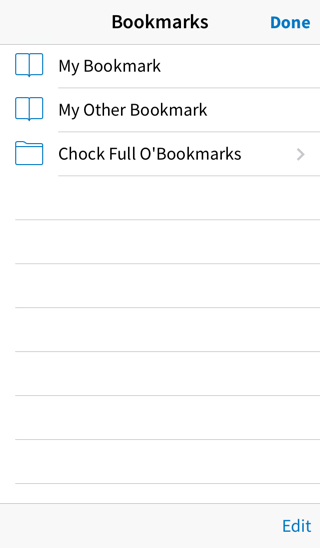
Tap on the book icon in the top bar to view / jump to a bookmark:
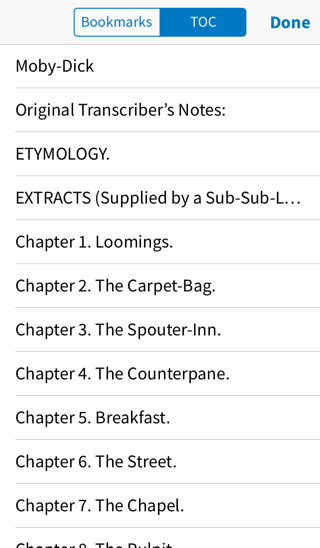
If you’re viewing an EPUB, this screen will also include a “TOC” section that you can use to jump to a particular EPUB chapter:
PDF Files
PDF files have their own separate interface (actually a PDF viewer system we licensed from another company and added Chinese reader support to):
The search / bookmark functions behave similarly to their counterparts for other document types, but to navigate between pages you can swipe your finger on the preview bar at the bottom of the screen. You can zoom in using the standard iOS pinch-zoom gesture.
The interface for looking up words in the same as it is everywhere else in Pleco - simply tap on some characters to view their definition:
Lyrics Reader
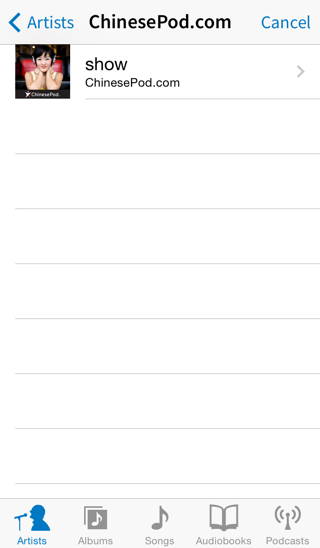
One more document reader mode is the Lyrics Reader function; this will let you view embedded lyrics from songs and podcasts in your iPhone’s music library. Choose “Lyrics Reader” from the Reader option in the sidebar menu to pull up a catalog of content on your iPhone:
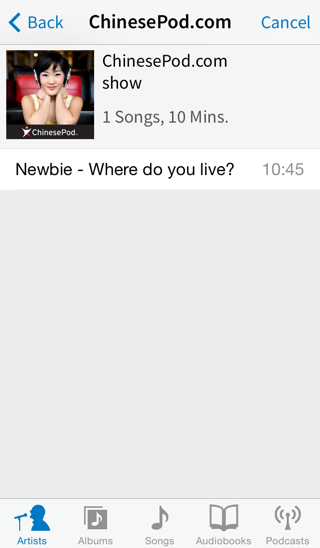
Navigate to your chosen song or podcast:
And tap on it to pull it up in the reader:
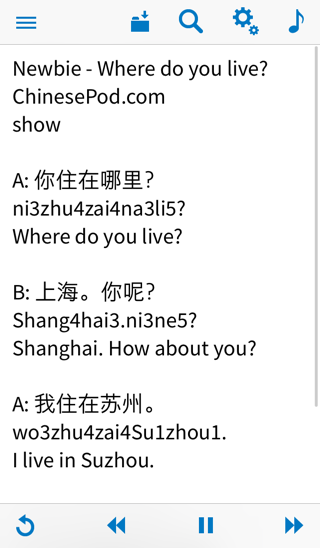
This works pretty similarly to the regular clipboard reader, but with the addition of audio playback controls on the bottom of the screen; there’s also a music note icon at the top right corner of the screen that you can tap to quickly return to the song browser and pick another song / podcast.
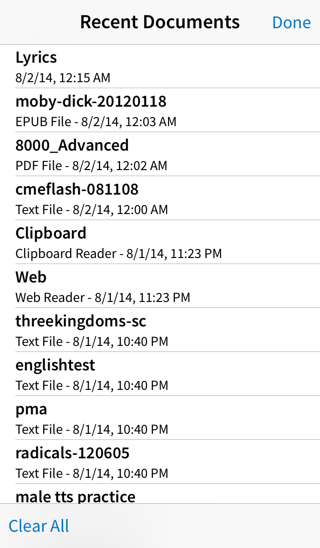
Recent Documents
The “Recent Documents” section in the sidebar menu is quite powerful, allowing you to quickly jump back and forth betwen recently opened documents. It keeps clipboard / web reader sessions in its history too, so if you used those recently you can get back to them by tapping on them just as with a recent file:
“All Recent Documents” gives you a much longer list of every file that you’ve opened recently:
That’s the end of this tutorial. From here, you can continue on to the Flashcards tutorial, which explains how to create and test yourself on vocabulary lists, the OCR tutorial, or dive right into the Dictionary, Reader, Flashcards, OCR, or Settings reference manuals.
Back to Index